I have used this several times now, and have had fantastic results every time! The strainer basket is perfect for Greek yogurt, and I also use it when making homemade cottage cheese! When I make yogurt, when it is time to chill it, I pour it into the small 4 ounce mason jars over a fruit sauce so the kids can get out single servings of it whenever they want it. It is perfect!
For foolproof Greek yogurt every time: 5 cups of milk (I use 0%) and 5.3 oz container of Greek yogurt at room temperature. Mix together. Add 7 tablespoons of powdered milk. Make sure fully mixed. Set for 9 hours. (Middle dots on clock blink when on.)
Starter yogurt cultures, freeze dried in boxes, gave me yogurt that never thickened.
Before I did the above, the yogurt consistency and flavor varied.
I have never heated the milk nor used a thermometer. I have no reason to use the strainer, as it is as thick as the Greek yogurt I use to make the batch.
I make two batches per week since July, 2015. The above combination works every time, giving me a consistency I like.
This version of the recipe should be printed in their booklet - as their recipe is too fussy and too many steps - with the possibility of error and inconsistency. ;)
I was looking for a yogurt maker (really, they are all just incubators since they keep the stuff inside within a certain temperature range). Yes, some people may think making your own yogurt is fiddly. It does take a bit of time and attention. I find it is all worth it to know exactly what is in what I am eating-and I eat quite a bit of yogurt straight as well as use it in smoothies and as a replacement in some things (baked potatoes) for sour cream. I wanted a well insulated one because I have found that all the yogurt makers with glass individual glass jarsI have used had a "hot spot" or just slightly uneven heating and the yogurt came out uneven in texture. I also wanted to make a quantity-not little individual servings. This kept the yogurt at an even temperature and the result was smooth.
Straining the yogurt has always been the part that uses the most equipment, time and space. With this item all you need is in one spot, easy to get to and use when needed. The straining basket has worked fine for me and is much preferable to using a cloth bag suspended over a bowl. Be gentle with the strainer, as you should with anything that has the fine mesh like this has. I think it is easier to clean than a cloth.
You don't have to strain the yogurt if you just want "regular" stuff. As has been stated before, how long you allow it to strain is directly related to how thick the end result is. Also, of course, the thicker the yogurt, the less of it there is, and the more whey there is. I don't use the whey, just yet, I may someday get "into" using it. Like making any "cheese" product it does take time and careful attention to the required heat at certain points in the process. If this is not your "thing" then there is a lot of decent yogurt to be bought. I like the process. Working with a living product has a certain kind of excitement and wonder about it as far as I am concerned. I have made it to the consistency of soft cream cheese-all without using any additives other than powdered milk.
I would buy it again if the need arises to do so. Most of my family that actually cooks are vegetarian or vegan so I am the only cook in the family who eats milk products or I would give it as a gift to each of them. More goodness for me!
I've only used it once and I loved it. It was super easy and the yogurt turned out great. I have made yogurt in the individual cups in a 1970's style yogurt maker and using mason jars, Styrofoam cooler and heating pad system. Uhhh..this was by far the easiest!
I used whole milk, heated it to 185° on stovetop (no double boiler); stirred in about a 1/4 cup of milk powder; let cool to 110°; stirred in 1/2 Brown Cow cup plain yogurt and set maker for 6 hours. I like mild tanginess. I strained the yogurt. I strained it too long for my liking but all you have to do is stir some whey back in. Also, the whey is delicious. I made a smoothie with frozen berries with some of the leftover whey. It's very similar to buttermilk so I will use it for pancakes or baking as well. So delicious! We eat a TON of yogurt at my house and at $4 a quart, this maker will pay for itself in no time. I think this yogurt maker is easy to use, makes great yogurt, and is a great value.
Edit: After reading some reviews complaining how what a waste of milk for only 1 1/2 cups of yogurt, I want to mention 2 things. You don't have to strain it that much and the second is imagine where all that whey goes from commercial yogurt production. It gets thrown away. Along with that waste, plastic tubs and shipping, making your own is cheaper in the long run and less waste overall.
EDIT: I've made yogurt about 10 times and it's working great. 5 1/2 c whole milk + 1/4 c finely granulated dried milk powder to 185 in metal bowl over pot of water. Set warm milk inside cold water bath; cool to 115, stir in 1/2 c yogurt. Set maker for 7 hours. Don't overstrain yogurt if you want regular yogurt. I get a quart of yogurt.
I bought this to make vegan yogurt. Or yogurt made from nuts rather than dairy milk...after a few tries using coconut milk and cashew milk I tried lactose-free milk , using milk is a winner. The yogurt comes out perfect. If I don't drain it it's like the thickness that you would get from a good quality yogurt from the store. However when you actually are draining it is when it becomes like Greek yogurt I don't time that I just leave for the day or whatever and come back and the yogurt is more of a thickness like ricotta cheese or a softened cream cheese. Well of course it tastes amazing...it's VERY strong tart flavor... more then from the grocery. Homemade is far more tart. I add additional probiotics that have 11 different cultures and they are from a capsule. I found a really didn't need to use additional made yogurt as a probiotic or culture just using lactose-free whole milk with the probiotic capsules was enough your choice.
I am sensitive to lactose but I wasn't sure about the milk and I'm probably not going to be doing that very much I would really rather use a nut milk so the next thing for me to do is to make a milk from the nut itself rather than purchasing it in a container. Or I had some lactose-free milk left over and I use those two cups with cashew milk and it came out with a thicker yogurt.. but still not what I was looking for.
After draining it you'll see that there is the way or a liquid that has come off and separated I don't know what anybody is doing with that I don't drink smoothies so what I do is give it to my dog for probiotics she loves it. I can also use it in a recipe that calls for water for example. But I'll just give it to my dog.
I don't want to continue using a dairy product so I'll try a couple more times with a nut milk if it doesn't work after that I'm done with it but the dash yogurt maker is an excellent product if you follow the directions for using a dairy product that comes out absolutely fantastic better than what you can get at a store and that's why I gave it 5 stars but for nut milk vegan I haven't found how to do it I just threw the product out I didn't even use it
UPDATE: I found I could use the whey with stevia sweetener and just drink it for probotics, tastes like yogurt... and my dog still gets some. I do the same as I stated above. I just gave up on non dairy and continue to use lactose free milk. I love it. for me, cooking on high burner, 8 minutes to reach 180° 10 minutes for it to cool in cool water, add culture/probotics then just cook overnight. EASY! I make yougert 3x a week, make yougert frozen pops.... I add billions of probotics with capsules before cooking. soooo worth it. I wish it were bigger! im considering buying a second one. besides greek yougert? make super thick..cheesecake, ..on bagels .. one of my best buys. soooo worth the price! enjoy and be well!

Feature Product
- HEALTHIER: Dash Greek Yogurt Maker Machine lets you make healthier, homemade yogurt right from your kitchen. You control the ingredients (Organic? Sweetened? Flavored? Plain?) making it better for you and your family
- COMPACT + LIGHTWEIGHT: Weighing 2lbs, this is a must-have for that first apartment, smaller kitchen, or college dorm. Plus, all accessories fit inside the base, taking up even less space, BONUS!
- QUICK + EASY: Set it and forget it! Prep time takes just 10 minutes (add milk, yogurt starter and other custom ingredients), leave overnight, and you will enjoy fresh, homemade Greek yogurt in just 8-12 hours (up to 2qts)
- PERFECT GIFT: The perfect wedding or new home gift. Its small size takes up little counter space, and its sleek design and trendy color options will match any kitchen décor (add to your registry now!)
- INCLUDES: Backed by a 1-year manufacturer warranty, the 20-watt Dash Greek Yogurt Maker, includes 2 BPA-free buckets with lids, strainer basket, recipe book, and recipe database access. All non-electric parts are easily wiped clean
Description
If you love the creamy, satisfying texture of Greek yogurt, the Dash Greek Yogurt Maker will be your new go-to kitchen tool. Get all of the probiotic benefits of Greek yogurt without the additives or the steep cost of store bought brands. Just use any type of milk and a little bit of store-bought yogurt to get started. A comprehensive Recipe Guide is included along with a Quick Start dial for easy reference. You will also gain access to our rapidly growing database of recipes! Make custom flavors, healthy gourmet treats -- and save money on store-bought Greek yogurt!
This is my first yogurt maker and first yogurt making experience. It took very little time to master consistently good yogurt. I don't care for store bought Greek yogurt but I LOVE this stuff. I prefer to use a thermometer and found that a candy thermometer with alert is perfect for yogurt making. I don't buy the over priced starters, but instead use Chobani plain with excellent results. I have only made whole milk yogurt but plan to try 2%. I have used milk from the grocery store (store brand) as well as Sassy Cow, which I especially like. I have found the best results to be to chill thoroughly and I prefer to strain longer for extra thick yogurt that can be used as sour cream. I have kept it simple and find agave to be an excellent sweetener that does not overwhelm or compete with the fresh taste. I also warm the yogurt maker and container prior to adding the yogurt fixings. I like the batch container so that I don't have to wait for all of the individual containers to be emptied. A gallon of milk and 12 ounces of yogurt makes 3 batches. Total cups before straining is approximately 129-1/2 cups. Finished cups produced will depend on how long you strain the yogurt. Total batch time is about 13 hours including preparation time, culturing, cooling and straining. Very little is hands on time. I wish I had not spent years debating the wisdom of purchasing a yogurt maker. There is something magical about homemade and I am thoroughly enjoying the experience. Also, I am lactose intolerant and have no digestion issues which has been wonderful.
We go thru a fair amount of yogurt here, and we both prefer the Greek style - our 'store favorite' goes for $2.50 a pint; when I started finding uses for whey in my kitchen projects, I began searching for a new solution.
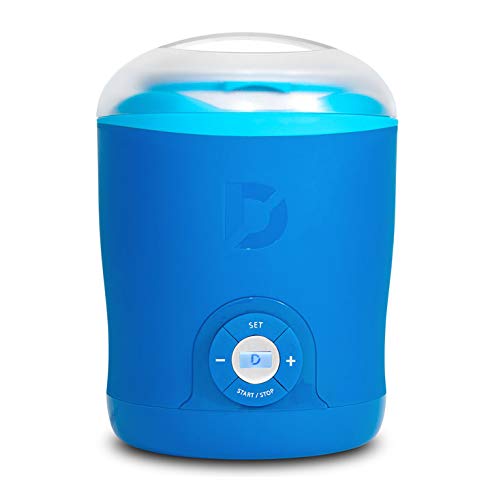
That's when I found this Dash maker: It makes yogurt in bulk, not in tiny cups, and it is provisioned for draining the whey from the yogurt. It is a simple product: a single sealed unit with digital controls on the front, essentially a temperature-controlled 'incubation chamber" that holds the yogurt -to-be while the bacteria do their thing - and an outer lid, of course.
It arrived with a chatty but useful manual/cookbook, a strainer/filter for separating the whey, a separation container that holds the strainer and catches the whey, and an inner lid. I made my first yogurt last night, and this morning, my wife pronounced it 'better than the store-bought'. Per the directions, I used 5 cups of milk - and gained two pints of good yogurt and a pint of whey; this mean my Dash yogurt maker will pay for itself with only FIVE batches - and I'm 20% of the way there already...
My first machine from Amazon was dead on arrival; Dash customer service was friendly, courteous and efficient, offering to send me a replacement directly, which I accepted. The replacement arrived a week later, and this one worked right out of the box.
I am very happy with my purchase and my results, I am very happy with Dash's excellent customer care, and with Amazon for allowing me to learn about this unit and buy it from them.
This is very easy to use.
UPDATE after using for 8 months:
I've had this since Sept. 2018. I've tried lots of different recipes and have found one for thick Greek style yogurt that does not require heating to 180* and then waiting for it to cool. I wrote a previous review that included recipe that does not required straining but did require heating and allowing milk to cool.
NO BOIL, NO STRAIN METHOD:
In microwave save bowl/measuing cup whisk together:
4 cups ULTRA PASTURIZED Whole Milk (will not work with regular pasturized milk)
40 grams powdered milk
Heat in micoowave for 2 1/2 minutes, to take the chill off the milk.
Mix in:
2 Tbsp. plain yogurt as starter.
Pour into Dash yogurt maker and set time for 8 hours (or longer if you want tarter yogurt)
When done, chill for at least 5 hours. (no need to strain)
If you are interested, the following is a review of what I have done to get a yogurt that is most to my liking:
OLDER NO STRAIN METHOD:
I think the straining to make Greek yogurt a bit time consuming, messy and wasteful (I do not use the whey for anything). So, after reading many reviews and the techniques people use to make their yogurt, and trying many of them, I have come up with one that I prefer that makes a thick somewhat tangy yogurt without straining.
1. 5 cups whole milk
2. 125 grams of powdered nonfat milk (25 grams per cup of milk)
3. 1/2 cup starter at room temperature. (Any active culture plain yogurt you get from the store will work. Amazon also sells powdered yogurt starter--many to choose from.)
A. In a microwave safe bowl or 8 cup glass measuring cup, whisk whole milk and powdered milk together until powdered is dissolved. Microwave on high in 3 min. intervals, stirring after each interval for a total of 9 minutes (3 - 3 min. intervals) and then in 1 minute intervals untils milk mixture reaches 185* F (I use an instant read kitchen thermometer https://smile.amazon.com/gp/product/B01HV5AL9G/ref=oh_aui_detailpage_o03_s00?ie=UTF8&psc=1 ) B. Let milk cook to 110* F. Stiring the milk with a whisk occasionally helps it cool. Or, if you are in a hurry to cool, place the bowl in an ice water bath and stir frequently to cool the milk quickly. When milk reaches 110* whisk in the room temperature yogurt starter.
C. Pour into the milk mixture into the yogurt maker and set time to 20 hours. The yogurt will be set long before 20 hours, but I like tangy yogurt and the longer it cultures the tangier it gets. You should experiment with the time, the yogurt is done when it is set--in as little as 5-6 hours, but the flavor changes with time. You should not culture more than 24 hours.
D. Refrigerate until thoroughly cooled.
E. Put cold yogurt into mixing bowl and whisk until smooth. Store in air tight container.
NO NEED FOR STRAINING-- the yogurt will be thick Greek yogurt without straining due to the added dry/powdered milk that was added.
The listing on Amazon at the time of review (7-14) says it will make up to 2 quarts. This is false. The unit even has a max line inside of plastic bucket that is at 5 cups. Of course, 2 qts. is 8 cups, therefore this is misinformation. The directions even state add 5 cups of milk (or other product) and 1/2 cup of plain yogurt. So that about does it. Other then this misgiving, the unit is cute, is designed well and works fine. The pink and blue colors that are available look like it is for the kids - wish they could have offered white, beige or black to match normal appliances. The timer is small as mentioned by others but it is doable. Also, be aware that this is really just an incubator for the yogurt, you must heat milk on your stove and then cool it before adding to the Dash Yogurt Maker. Hope this helps.
***NOTE: This unit DOES NOT make 2 quarts of Greek yogurt at a time. The unit only comfortably holds 5 cups of liquid, which is 40 oz, which is significantly less than 2 quarts. It actually makes 2 - 3 cups of finished, strained Greek yogurt.***
Works great! I tested it with water prior to making yogurt to verify that it was heating to the proper temperature (110 degrees F) and it was. Easy to use, easy to clean and way better than making yogurt in baby food jars. The strainer works perfectly, with thick creamy Greek yogurt after one hour of straining and custard-style yogurt after two hours of straining. I yield about three cups of finished Greek yogurt from four cups of whole milk. I usually finish one batch and use 1/2 cup from that batch to immediately start a second batch. I also heat my milk in a large, Pyrex, 8-cup measuring cup in the microwave to 185 degrees F, starting with 5 minutes at High, whisk and check temp, 3 minutes at High, whisk and check temp and then 3 minutes more at High and it's usually right at 185. Direct heating on a stove cooks the milk, which is bad, and I don't have a double boiler. This method is fast and uses less energy too! I then cool to 110 degrees F, whisk in 1/2-cup of room temperature yogurt, pour into the blue container, install into the yogurt maker, set the timer to 12 hours and done. I use 5-Star Sanitizer on everything that touches milk after it has cooled to avoid any rogue, wild bacteria or yeast from infecting the batch.

0 comments:
Post a Comment